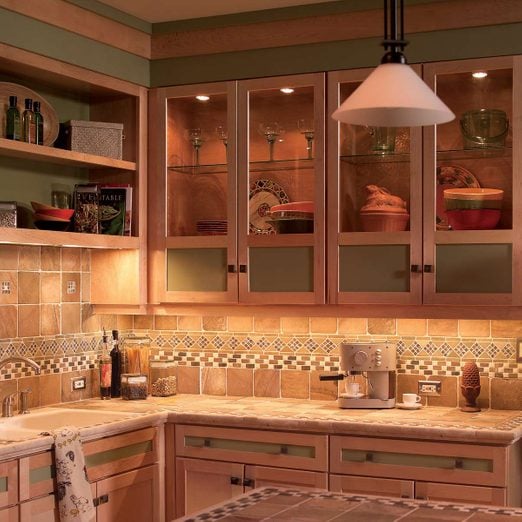
How to Install Inside Cabinet Lights – 3 Easy Steps
If you’re looking for a way to spruce up your interior without spending a fortune, installing inside cabinet lights is a great option. Not only are these lights easy to set up, but they also look great and add an extra level of convenience to your home. Here are some tips on how to install inside cabinet lights:
1. Determine the type of light you want: There are many types of cabinet lights, so it’s important to choose the one that best matches your needs. You can find this information on the label or in the instructions.
2. Measure the space: To determine how much space you need, first measure the space where you will be installing the light inside. Once you know this, multiply it by 2 to get the overall size of the light.
3. Read the instructions: Most of these lights come with installation instructions, so be sure to read them before starting!
Find the right light for your space
Once you’ve determined the type of light you want, you need to find the right light for your space. This is easy to do because there are many different types of cabinet lights. You can read about this in the instructions or consult a photo guide. Use a drill: If there is a screwdriver or other tool handy, use it to attach the light to the wall. Use a hanger: If your light doesn’t have a hanger, you can buy one online or at a store.
Determine how much space you need
First measure the space where you will be installing the light. Once you know this, multiply it by 2 to get the overall size of the light.
Use a drill: If there is a screwdriver or other tool handy, you can easily drill a hole in the wall and install the light. Use caution: Be sure to follow all of the installation instructions carefully and not touch any of the wires or glass! Test out your light: After everything has been installed, test out your light by turning it on and off. Enjoy your new addition: Once you have installed inside cabinet lights, you can enjoy them without having to spend a fortune!
Buying Under-Cabinet Lights
When you’re shopping for under- cabinet lights, it’s important to take into account the budget. Many times, a light that is cheaper than a high-end model will perform just as well. However, be sure to read the reviews before making your purchase. Many people have had great experiences with these lights, but some users did not. Choose the right type of light: There are three types of cabinet lights: spotlights, floodlights, and recessed lights. Choose the one that best matches your needs and budget.
Find power
To install the light, you will need to find a power outlet and plug it in. You can also use a drill to guide the light into the wall. Position the light: Once you have found the correct place for the light, position it so it is pointing in the right direction. Wait for the power to come on: Once the power comes on, connect your light using its jack and connect your cable to the outlet.
Plan the wiring route
Once you have determined the type of light you want, you need to plan the wiring route. You’ll want to make sure that each cable is connected in a way that won’t cross any wires or create any problems down the road. Use a drill bit: If you’re using a drill to screw in the light, be sure to use a drill bit that is specifically designed for this task.
Use wire hangers: If you’re not able to get your hands on a drill, you can also use wire hangers to connect each cable to the light fixture. Use anchors: Finally, if you’re using anchors, make sure they are placed so they don’t touch any other pieces of furniture in your home.
Connect wire to the supply voltage
Now that you have the light connected to the power, it’s time to connect the wire to the supply voltage. This will ensure that your light is working properly. Mark the location: Mark the location of the light so you can match it up with the door or other equipment. Drill a single hole:
If you’re using a screwdriver, be sure to use a slow and consistent drill bit, so you don’t damage your door or other furniture. Screw in the light: screws should go into one side of the light and then come out the other side (or vice versa).
Tighten everything down: Once you have everything connected, tighten everything down so that nothing moves. Test it out: Test each light by turning it on and off. It’s important to make sure that all lights are working properly before continuing.
Determine the size of the light
Once you know the size of the light, it’s time to determine the type of light it will be. There are several types of cabinet lights, so it’s important to choose the one that best matches your needs. You can find this information on the label or in the instructions.
Measure the space: Once you know the size of the light, it’s time to determine the type of light it will be. There are several types of cabinet lights, so it’s important to choose the one that best matches your needs.
You can find this information on the label or in the instructions.
Read the instructions: Most of these lights come with installation instructions, so be sure to read them before starting!
Drill the hole for your light
First, drill the hole for your light. Then, use a screwdriver to move the light around so that the screws are in place. You may need to do this in several places depending on the type of light you are installing.
Add the wire: Once you have drilled and screwed the light in place, add the wire to the screwholes. This will help keep your light connected and organized. Enjoy your new cabinet lights: After you have installed your light, take a look and enjoy it!
You may be surprised at how well it looks and how much easier things are now that you have added inside cabinet lights to your home.
Place the light in position
Once you have determined the type of light you want, you will need to place it in the correct position. You can do this by using a drill or by using a screwdriver. Use the screws: Once the light is in place, use screws to hold it in place. Test the light: After everything is set up, test the light by turning it on and off. Enjoy your new addition: Once you have installed inside cabinet lights, be sure to enjoy them!
Enjoy your light!
After you have installed your cabinet lights, be sure to enjoy them! Install them so that they are always in use and make your home look beautiful!
Read more http://reinspiredkitchen.com/
Image source https://www.familyhandyman.com/project/how-to-install-under-cabinet-lighting-in-your-kitchen/